If you’re using Facebook ads there’s one key tool you must set up to get the most out of your social ad budget.
I’m sure you’ve heard of it, the Facebook Pixel.
The Facebook pixel is a data-gathering tool that helps you run super targeted campaigns and measure the results of your campaign, so it’s important to try to get it installed before you even start running your Facebook ads.
Let’s jump into how this all works and how to get it set up in your account.
Table of Contents
Using The Facebook Pixel
Any analysis you do on your campaigns is only as good as the data being collected and stored by the Facebook Pixel.
So you want to make sure you set this up correctly.
We’re going to set up the Facebook pixel in this article, but it’s important to know that you do need to set up key events like Leads and Sales separately if you want to track those in your campaign.
How Does The Facebook Pixel Work?
The Facebook Pixel is a few short lines of JavaScript code that you insert on the pages of your website.
When someone visits your site, this pixel records some basic data about where they came from, when they came and what actions they took.
The pixel code runs when someone visits your site and reports on what they did. This is called a pixel ‘fire’.
So when someone visits an article on your website with the URL /this-is-my-business/ Facebook knows that someone visited that page.
How to Install and Use the Facebook Pixel
Facebook has made installing and using the pixel as easy as possible, which makes sense given how important the data it gathers is.
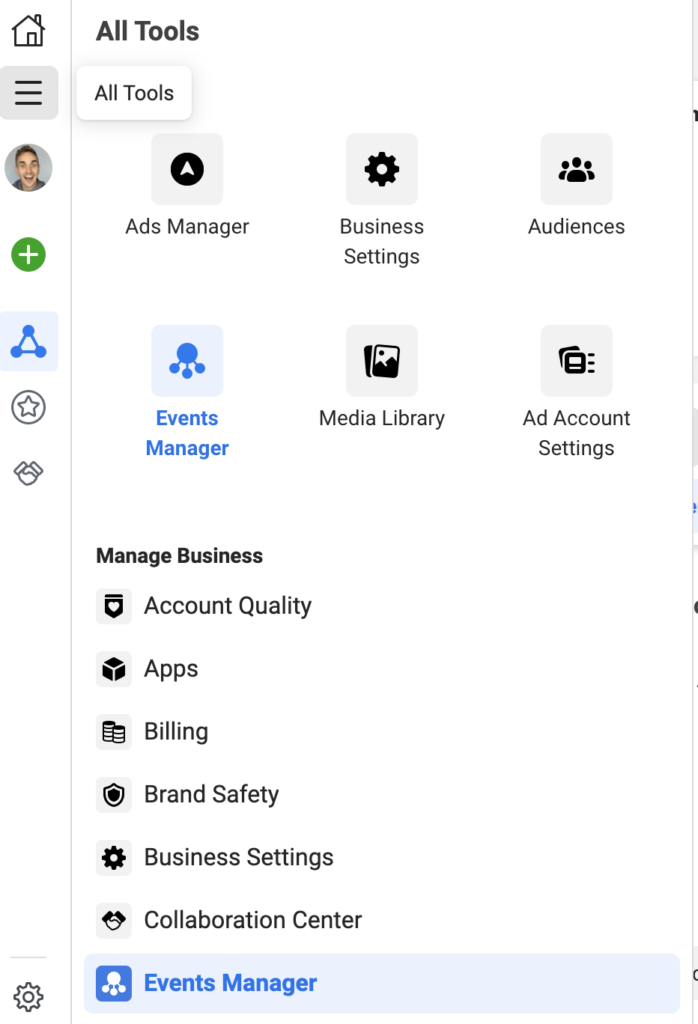
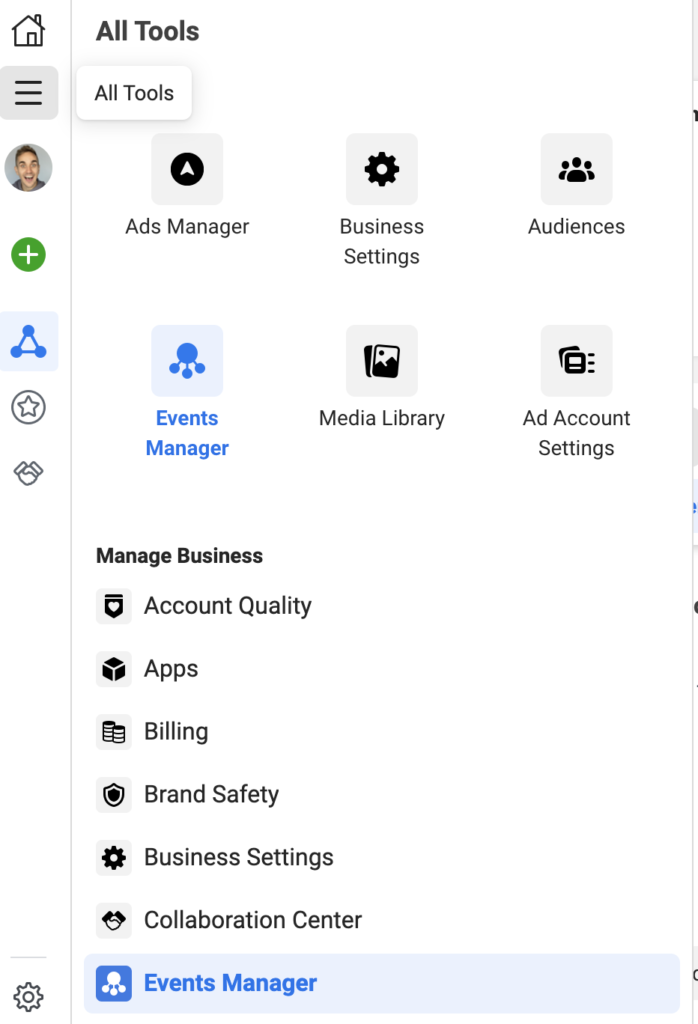
1) Go to All Tools > Events Manager
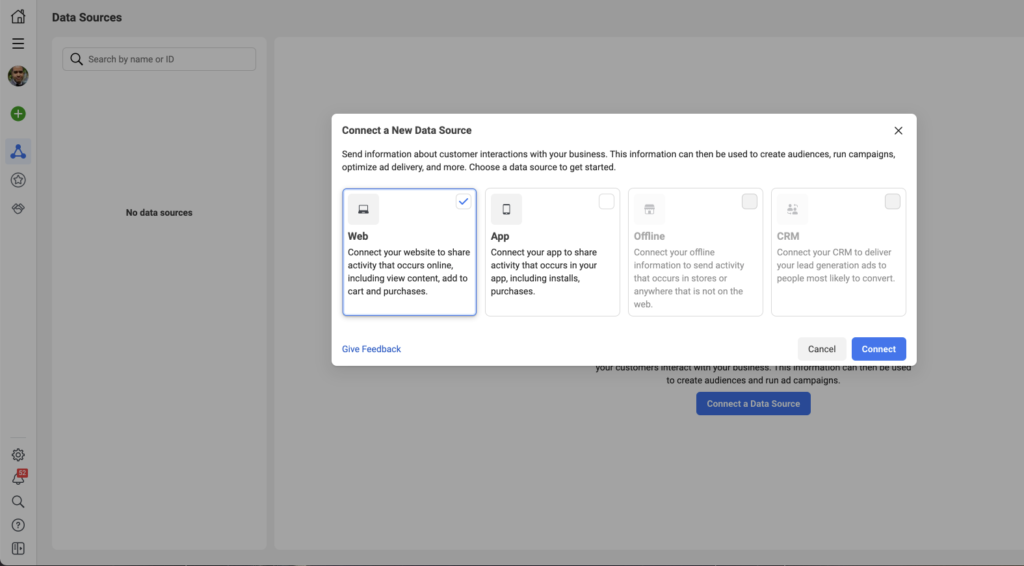
2) Under Connect A New Data Source Select “Web”
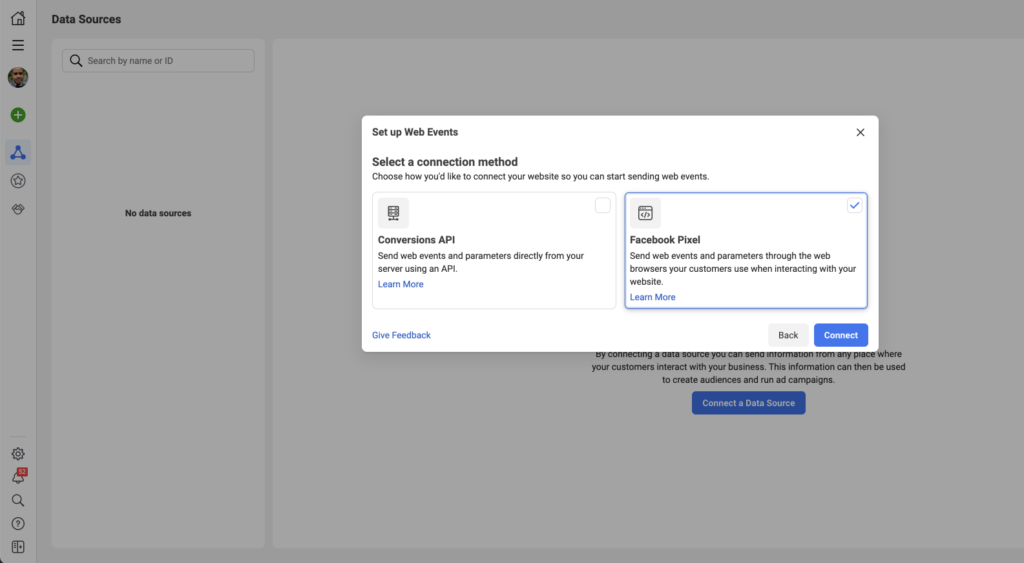
3) Select “Facebook Pixel”
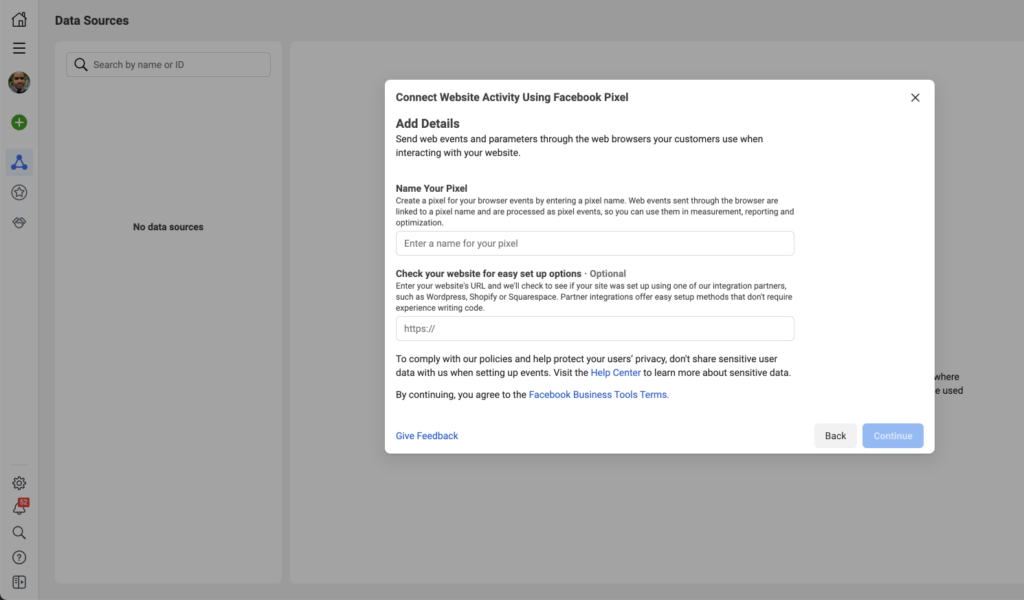
4) Give Your Pixel A Name (your business name is fine)
5) Install the pixel code on your website.
We always install the Facebook pixel using Google Tag Manager.
Depending on your website there usually a setting to add a code to all pages in the <header area or are also plug ins you can use to do this like PixelYourSite.
If you delegate your web design to someone else, you can also easily send them the code and ask them to add it to the header code of every page on your website.
Test Your Pixel
Just because your pixel is successfully installed and marked as active does not mean that it is accurately returning data.
Before pushing any traffic to your site with paid advertising, you should test your pixel.
Facebook has an easy tool you can use to test our your pixel called the Facebook Pixel Helper.
It’s a free chrome extension that will show you what pixels are firing on any page you go visit.
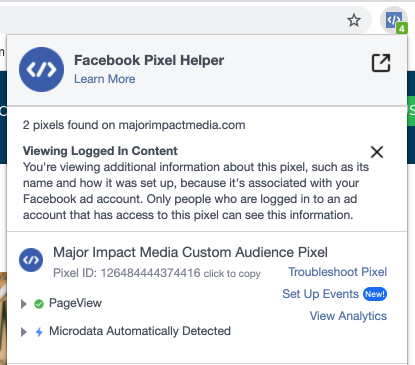
Go to your website and check to make sure the pixel is firing correctly.
As best practice it’s always a good idea to check any page you are going to run ads to with the pixel helper before starting a campaign.
How to Find Your Facebook Pixel
If you need to find your pixel after you created it, it’s always available from the menu bar in your Facebook ads manager.
Go to the left level menu in the Facebook Ads Manager and select All Tools > Events Manager.
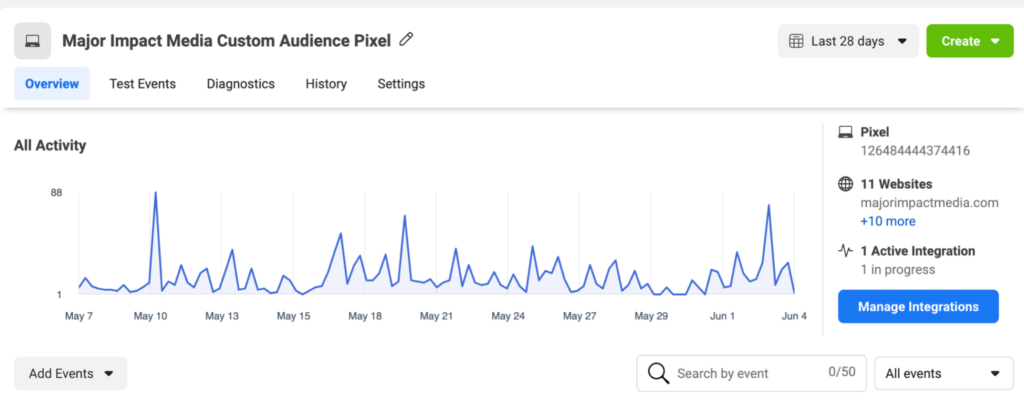
Here you will have an overview of your pixel and the events linked to that pixel.
The Facebook Pixel and iOS 14
Some Facebook pixel functionality is reduced for users with updated Apple devices because of the changes to third-party tracking after iOS14 was released.
You do still need to install your Facebook pixel like normal, but there are also some important steps all Facebook advertisers should take to move forward after iOS14.
Facebook recommends that all advertisers use their conversion API alongside the Facebook pixel as well.
Summary
As you can see it’s really not that difficult to get the Facebook pixel set up so you begin tracking immediately.
Even if you don’t have plans to advertise right away, the pixel will help you understand how to engage with current customers and find new leads.
Happy tracking!


0 Comments