
Facebook is now requiring that all advertisers verify their domain with Facebook in order to advertise on their platform.
And this is one of the most important steps advertisers can take with Apple’s iOS14 updates.
You can follow these 5 easy steps to verify your domain with Facebook.
You’ll need access to your business manager, website and cpanel from your hosting service.
It took us about 4 minutes to do this, so let’s dive in.
Table of Contents
5 Steps To Verify Your Domain With Facebook
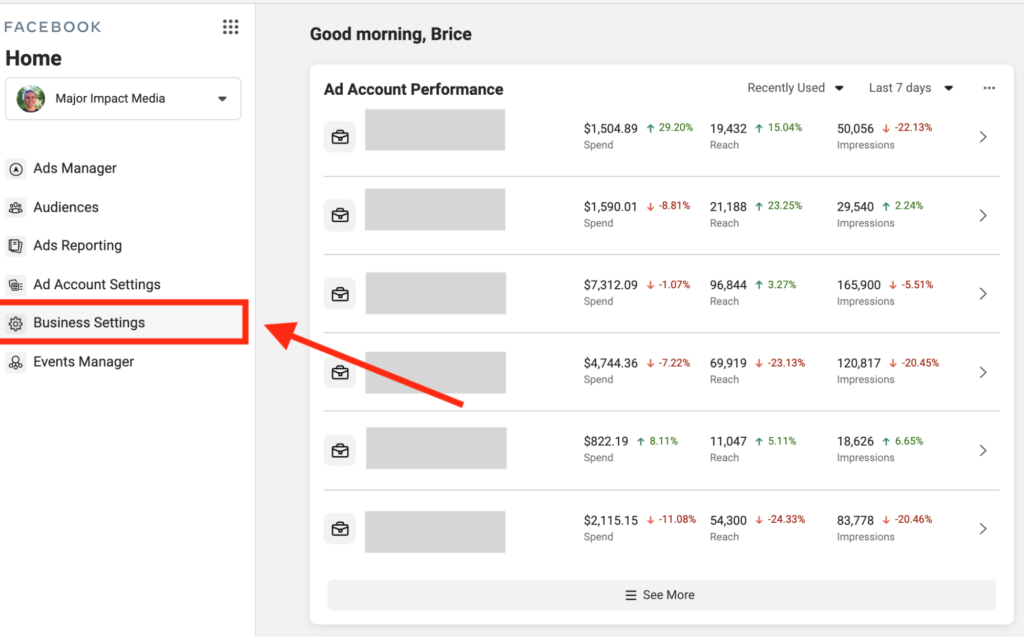
1) Open Up Your Business Manager Settings
Go to business.facebook.com to access your Business Manager.
If you haven’t created a Facebook Business Manager for your business, you’ll have to create one to get started advertising on Facebook.
Navigate to the Business Manager Settings on the left hand side.
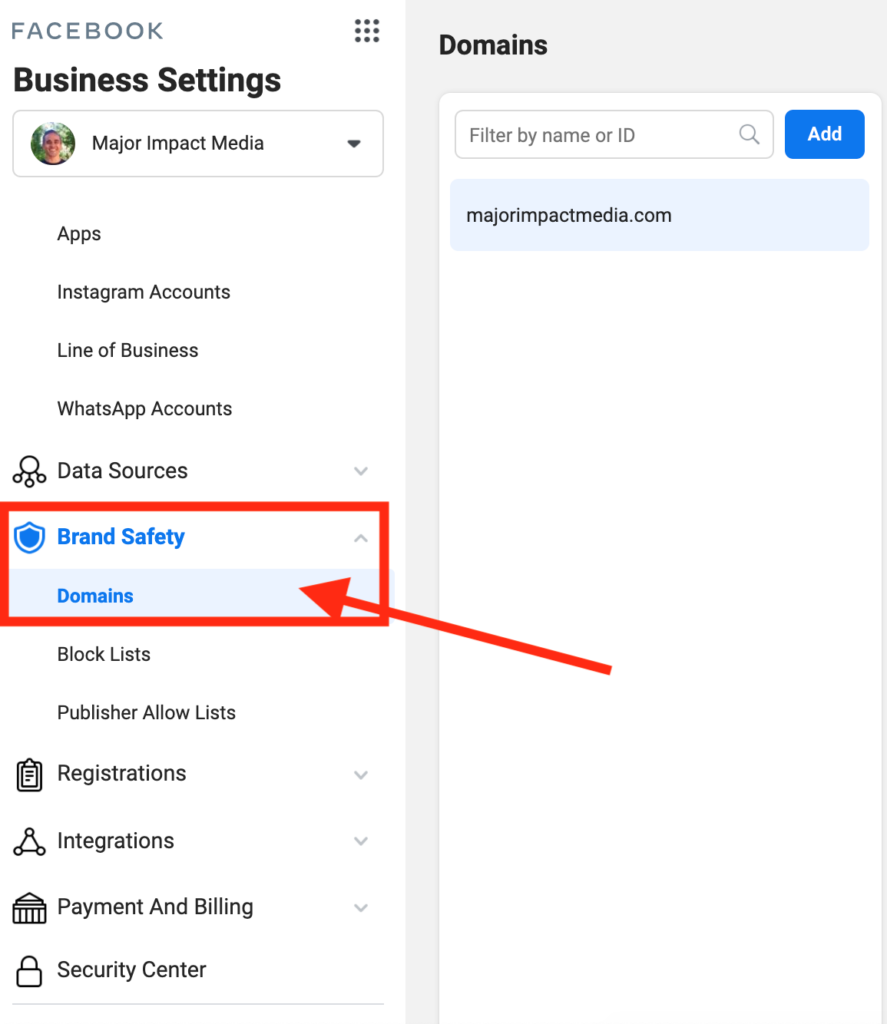
2) Open Up Your Domains Menu
Navigate to the “Domains” section under “Brand Safety”
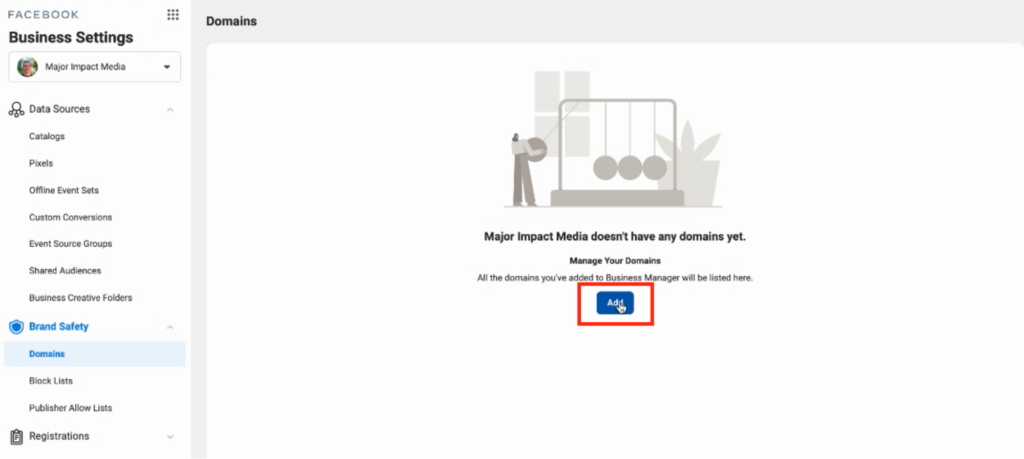
3) Add Your Domain
Click the “Add A Domain” in this format – “yourdomain.com” You do not need to include http:// or https://
4) Verify You Own The Domain
You’ve got three options for how to verify your domain.
- Adding a TXT record to your DNS
- Uploading an HTML file to your server
- Placing an HTML script on the homepage of your website.
The first option is easy if you have access to your cpanel.
Facebook will provide you with a DNS verification that you need to complete to verify that you own the domain.
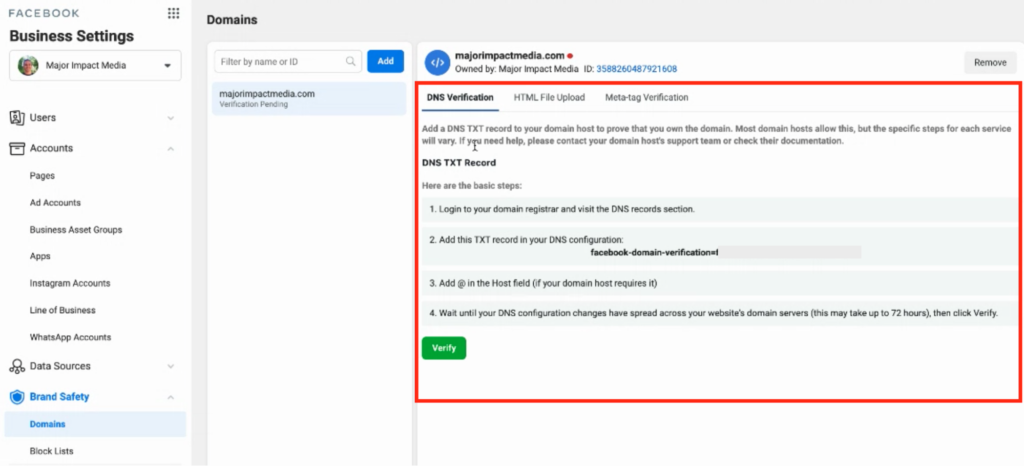
You can add a TXT Record through the cpanel of your hosting provider.
Typically this is done by logging into your hosting provider, going to your DNS Manager and clicking on “add TXT record”.
If that’s too much go with option 3: meta-tag verification.
You just copy and paste a small bit of code to your home page by clicking the “meta-tag verification” menu option there in the top right.
With this method all you need is access to your website and place that the same place you have other tags like Google Tag Manager.
5) Assign The Assets To Your Domain
Once you’ve verified the domain you will see two buttons to “Assign Partners” and “Add Assets”
Through “Add Assets” you can attach your domain to the Facebook pages that us that domain.
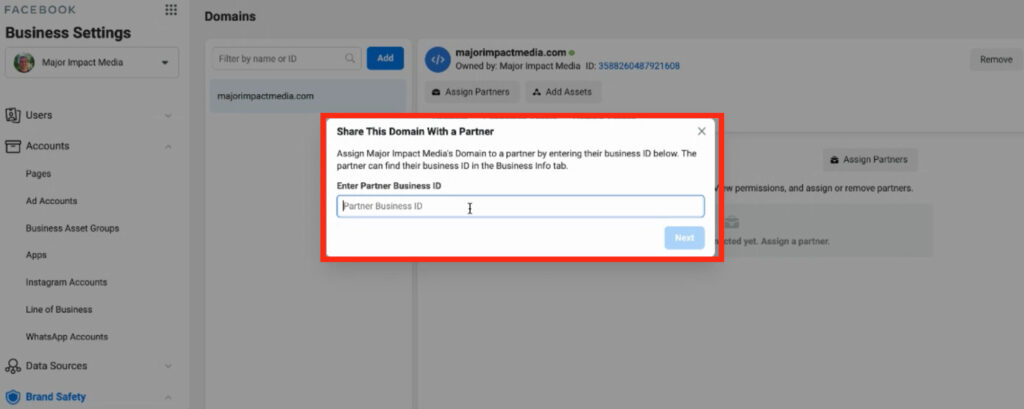
If you have an agency or partner you work with you can share the domain with them by clicking “Assign Partner” and entering their partner Business ID.
That’s it!
Quick Checklist To Verify Your Domain With Facebook
At this point you should have completed:
- Adding your domain to the “Domains” under Brand Safety.
- Verifying your domain by adding a TXT Record in your DNS Management
- Attaching your domain to your Facebook Page
- Sharing your domain your ad agency and ad partners


0 Comments